Your iPhone is more than just a device; it’s an extension of your personality. One way to make it truly yours is by personalizing your ringtone. While you can choose from a range of default ringtones, creating a name calling ringtone adds a unique touch that reflects your individuality.
In this guide, we’ll explore why personalizing your iPhone ringtone is a great idea and provide step-by-step instructions for creating custom name calling ringtones. We’ll also delve into customization options, contact-specific ringtones, troubleshooting, and why this small tweak can make a big difference.
Why Personalizing Your iPhone Ringtone is a Great Idea
Personalizing your ringtone offers several advantages:
- Distinctive Identity: A personalized ringtone helps you stand out in a crowd. When your phone rings, you’ll know it’s yours, even in a noisy environment.
- Emotional Connection: Hearing a loved one’s name when they call adds a personal touch and enhances the emotional connection.
- Effortless Recognition: Custom ringtones for specific contacts allow you to identify callers without looking at your phone.
- Fun and Creativity: Creating custom ringtones is a fun way to express your creativity and add a touch of humor or sentimentality to your device.
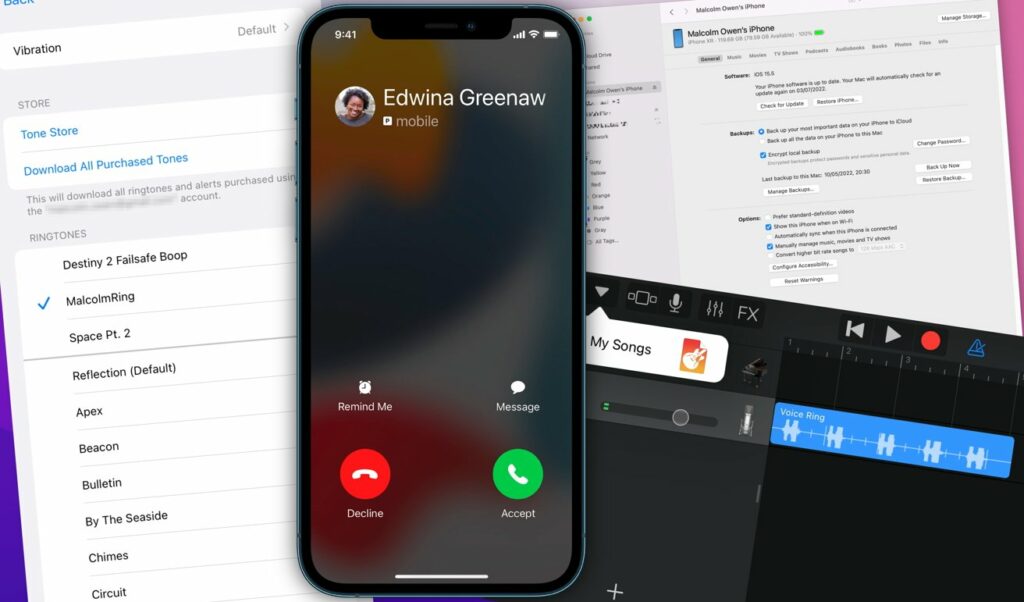
Steps to Create a Name Calling Ringtone on Your iPhone
Follow these steps to create a name calling ringtone:
- Choose a Voice Recording: Open the Voice Memos app on your iPhone and record the name or phrase you want as your ringtone.
- Trim the Recording: Trim the recording to the desired length, typically no longer than 30 seconds.
- Save the Recording: Save the trimmed recording with a clear and recognizable name.
- Transfer to GarageBand: If you don’t have GarageBand installed, download it from the App Store. Import the voice recording into GarageBand.
- Edit in GarageBand: In GarageBand, you can further edit the recording, add effects, and adjust the volume.
- Export as Ringtone: Once you’re satisfied, export the edited recording as a ringtone. GarageBand will save it in the “Tones” section of your iPhone’s settings.
Customization Options and Settings for Unique Ringtones
When creating custom ringtones, explore various customization options:
- Sound Effects: Experiment with sound effects, pitch adjustments, and speed alterations to create unique tones.
- Music Integration: Combine music with the name calling recording to create a personalized melody.
- Vibrations: Set custom vibrations to complement your ringtone. This adds a tactile dimension to caller identification.
How to Assign Personalized Ringtones to Specific Contacts
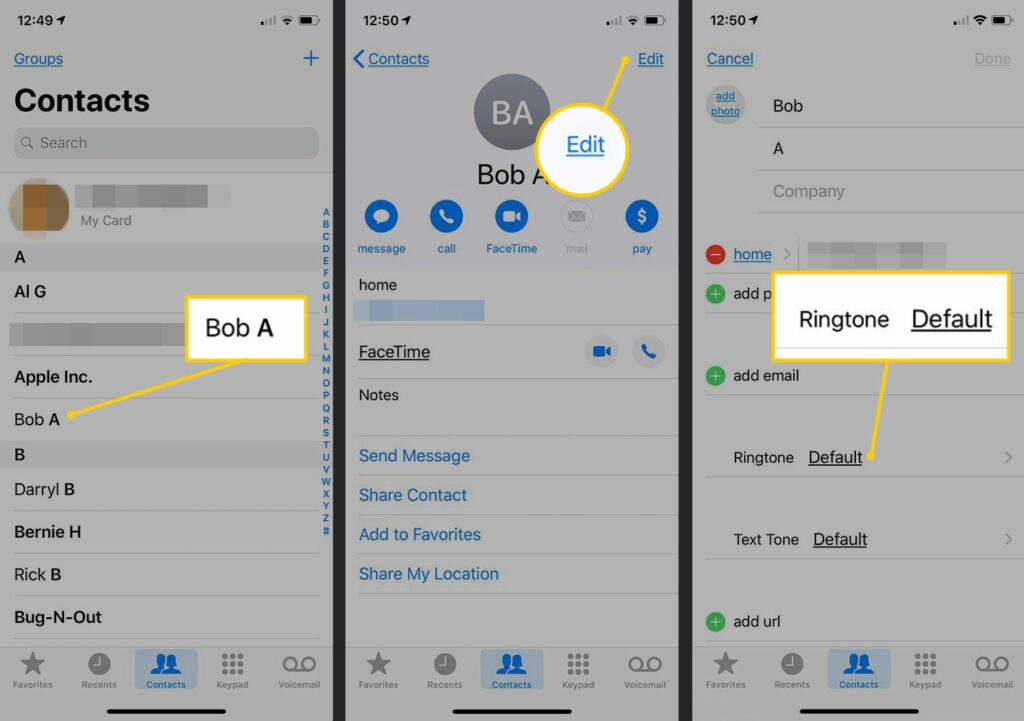
After creating your name calling ringtone, assign it to specific contacts:
- Open Contacts: Go to your Contacts app and select the person you want to customize.
- Edit Contact: Tap “Edit” in the upper-right corner.
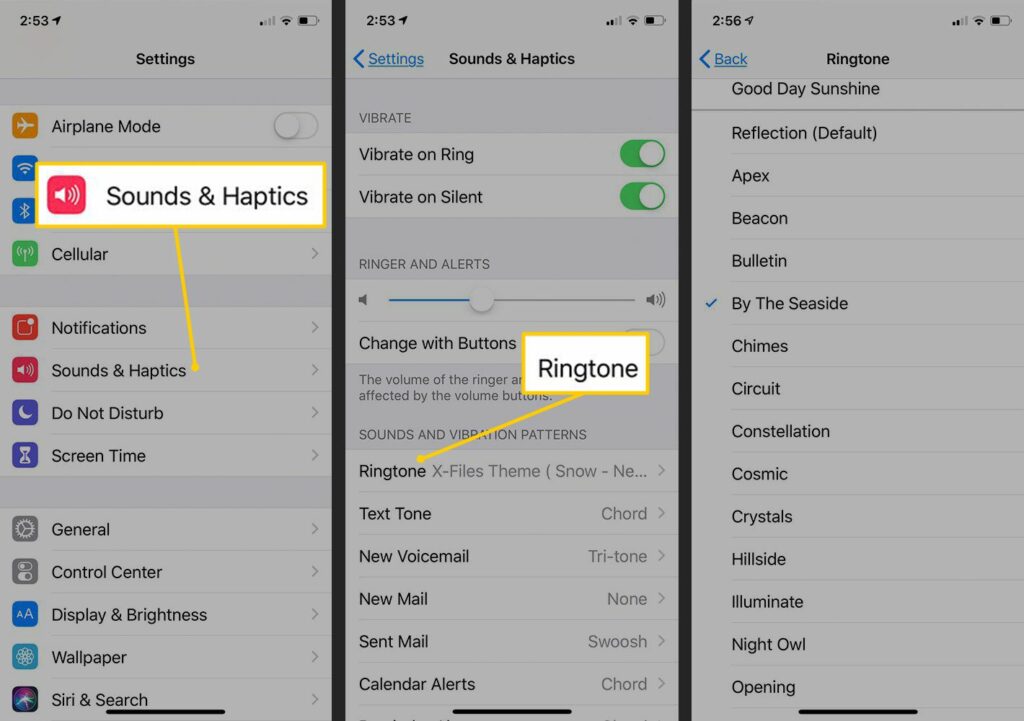
- Ringtone: Scroll down to “Ringtone” and tap it. Choose your custom ringtone from the list.
- Save: Tap “Done” to save your changes.
Now, when that contact calls, your personalized ringtone will play.
Troubleshooting Common Issues with Ringtone Customization
If you encounter issues with your custom ringtone:
- Check File Format: Ensure your ringtone is in the correct format (M4R).
- Length: Keep your ringtone under 30 seconds in length.
- Syncing: If the ringtone doesn’t appear on your iPhone, sync it via iTunes on your computer.
Personalizing your iPhone with name calling ringtones is a creative and fun way to make your device uniquely yours. It adds a personal touch to your communication experience and helps you identify callers with ease.
By following the steps outlined in this guide, you can create custom ringtones that reflect your individuality and enhance your iPhone’s functionality. So go ahead, have some fun, and let your iPhone speak your name in your own voice.